
All of the major version control systems (VCS) allow you to use SSH keys as a means of proving your identity. Simply upload the public key from your SSH keypair, and when you attempt any operation to a remote repository, your private key is presented and verified against the public key assigned to your account. Security conscious customers might be concerned about the loss of SSH keys, and the possibility of unauthorised access as a result. Wouldn’t it be great if there was an additional requirement on your SSH keys to verify their usage?
In this post, we are going to look at how SSH key signing can be used with GitHub Enterprise (or GitHub Enterprise Cloud) to verify key usage, provide time bound access to the repositories containing your code, and how Vault control groups can be used to authorise requests for extended key signing TTLs.
Creating an SSH key and adding it to Github
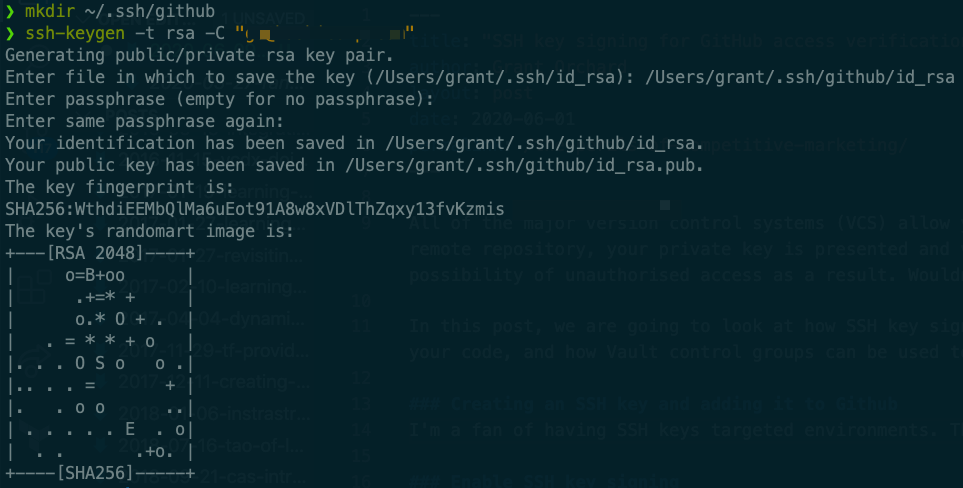
I’m a fan of having SSH keys targeted environments. This gives me some level of comfort that if I was ever to mistakenly share a key then the blast radius is limited, and the amount of effort I would need to go to in order to replace my public key is reduced. As a result, I am going to create a new key in an easily identifiable directory.
You will be prompted to provide a destination for the key to be created in. I went for the creative location of ~/.ssh/github/id_rsa - your public key will be placed in the same directory. If you want to provide a password for your key then this is the time to do so. Just remember when choosing a password - correct horse battery staple.
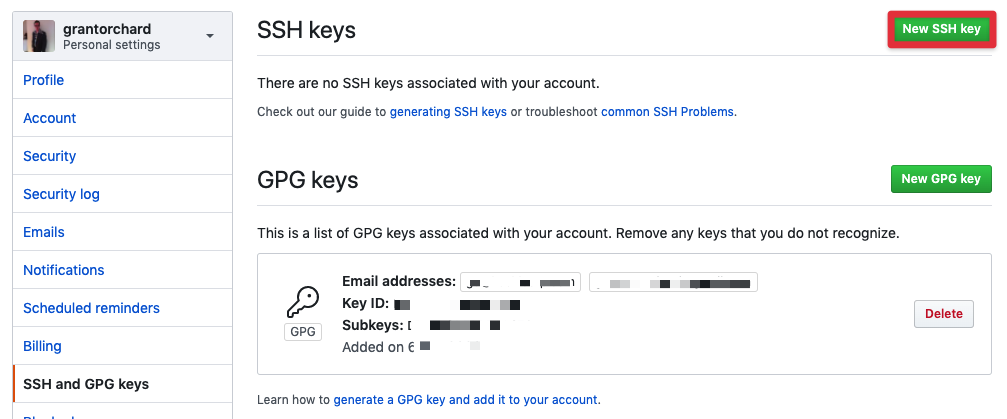
Once you have created your SSH key, it is time to upload the public key to GitHub. Open up your profile, and navigate to SSH and GPG keys in your profile settings. Click on the big green button that says New SSH key, upload the contents of your id_rsa.pub file, and give it a recognisable name.
At this point in time, you could start using SSH based authentication to GitHub, but let’s keep going - this is where things get interesting.
Enable Vault SSH signing
First up, we enable the SSH secrets engine. Each Vault engine can be enabled multiple times, so in this case we are going to use a custom path that shows the engine type and the function in the name.
The second command generates a CA that will be used to sign the SSH keys. You can also bring your own certificate from another CA if you prefer.
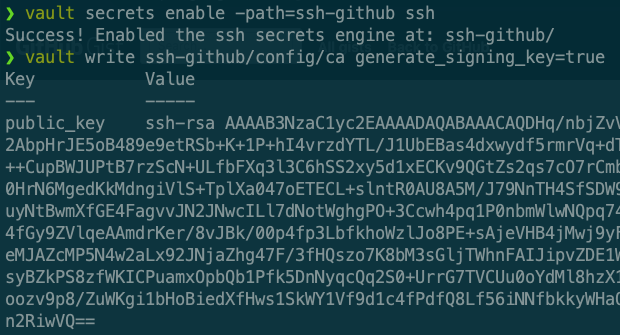
The response from the second command will be the public key of the CA. Let’s head over to your GitHub organisation to enable SSH key signing and upload the public key of your CA.
Add CA to GitHub
Certificates can be added to your GitHub organisation under the settings tab of the organization settings.
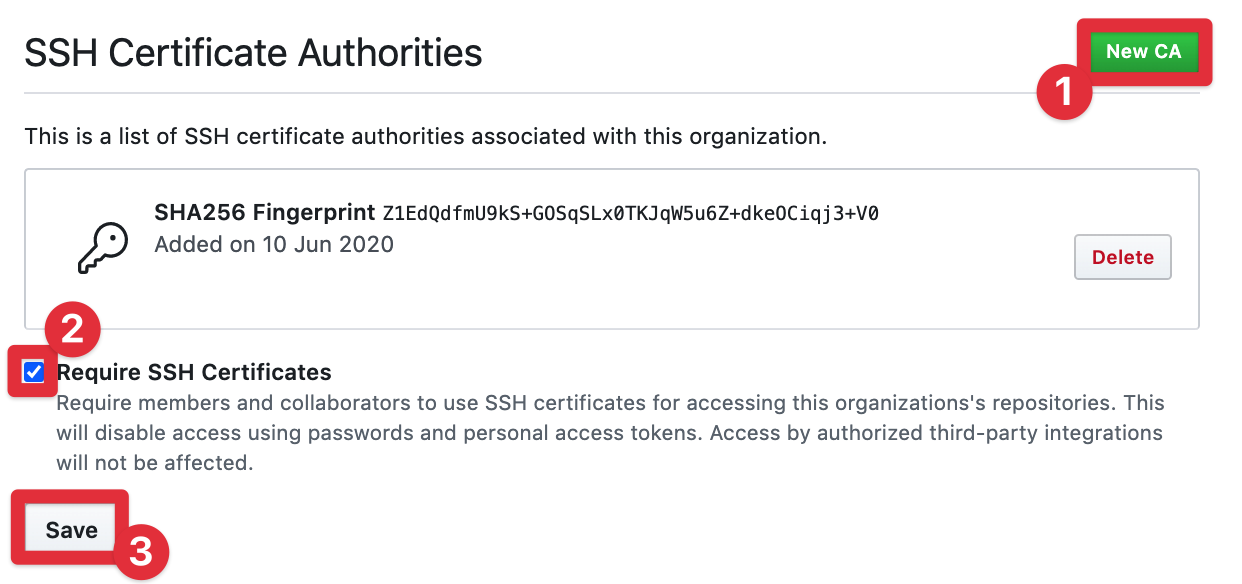
Once you’ve added your certificate, be sure to check the tickbox mandating SSH keys for authentication and then save your config. With that, your GitHub setup is complete. Back to Vault!
Create Vault roles for signing
For this example, we are going to create two roles. The first is going to be a very short signing period - unrealistically so, but it demonstrates the principal of short lived access nicely.
You will note the TTL of five minutes, and the max TTL set to the same. The other field of interest is allowed_extensions, where we explicitly permit the use of the attribute that GitHub requires to map your SSH key through to your user.
The second role is going to have a much longer TTL (five days).
Create access policies to CA signing roles
Policies are the mechanism that Vault uses to control access to paths, in this case the roles we created previously.
The first of these is very simple, the path and the capability. If you’re assigned this policy then you can just submit your SSH public key to the endpoint to get it signed.
The second policy is a bit more complex. If you want a longer lived TTL on your SSH key, then somebody needs to give the thumbs up. That somebody must be a member of the github_approvers group.
Finally I am going to attach both of these policies to my account.
Alright, so we have everything in place to give this whirl. Let’s get into it!
Validate it all works
First of all, we want to make sure we don’t get any kind of strange false positive here, so I’m going to attempt to clone the repo before we sign my SSH key. First up, I’ll update my ssh config file (~/.ssh/config) to make sure it uses the right keypair.
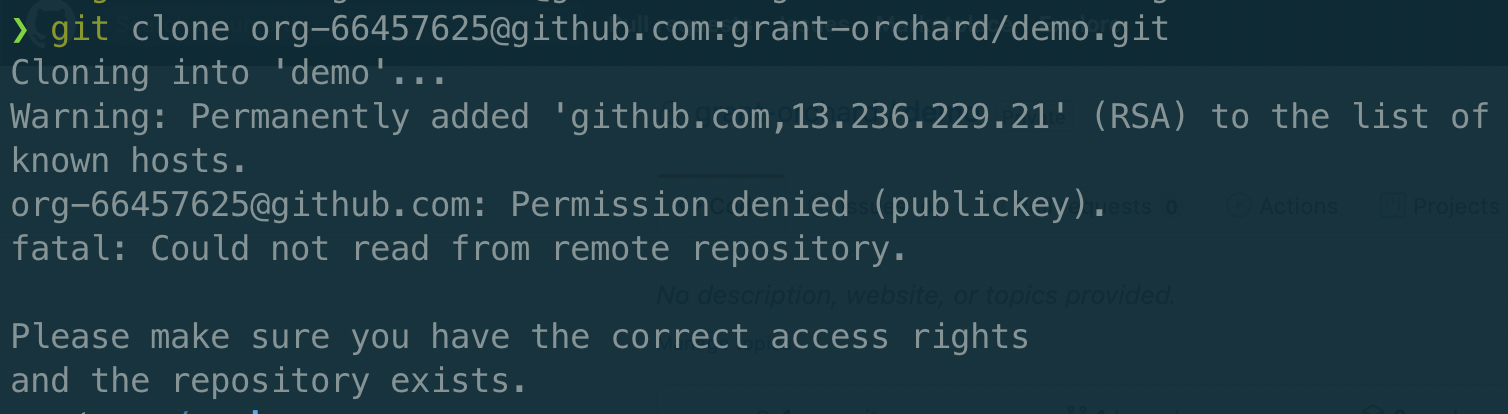
Bingo! Failed as expected, and even told me that I was denied due to the public key.
Before we submit a key for signing, we need to login to Vault as a user. I’m also setting my public key value to a variable for easier reuse. You may remember earlier on that I mentioned an extension that we had to include for GitHub to map your signed key through to your ID. My GitHub username is “grantorchard”, so this is the value assigned to that attribute.
To simplify things a little, I’m going to just drop the signed key value within the response directly into the correct file for the ssh-agent to pick it up automatically.
WARNING: It is important to note that Vault does not validate certificate extension fields. This means that you could impersonate another Github user by inserting their username for the login@github.com extension. Use of control groups (as demonstrated below), or a trusted intermediate service that mapped the logged in user to their Github account should be used for production delpoyment.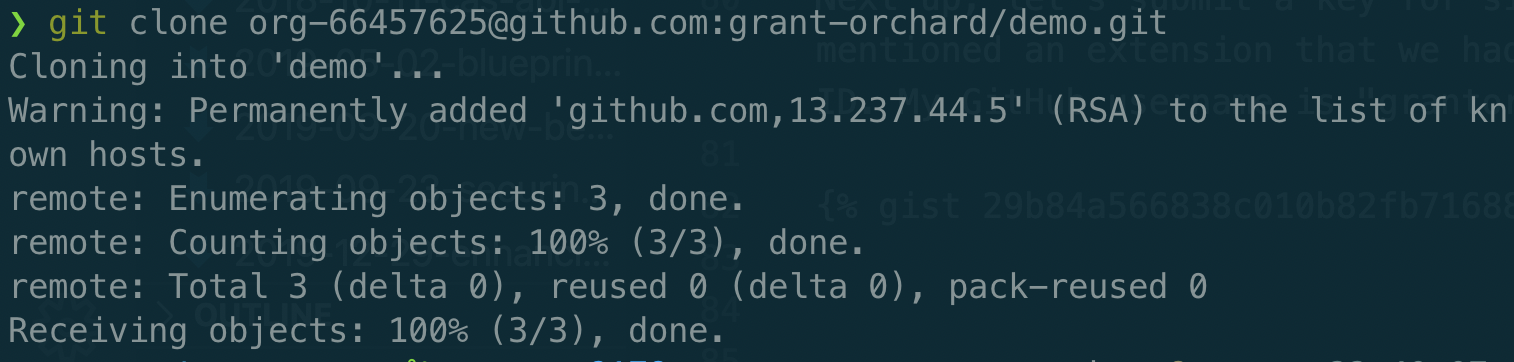
At this point everything appears to be working as expected, but the whole five minute TTL is killing my productivity. Let’s see what happens when I attempt to use the github-long-ttl role to sign my key.
Control groups
Submitting our key for signing looks very similar, simply shanging the role that is signing our request.
While the command is similar, the response is very different - I’m not getting a signed key back at all. Instead I get a wrapped token that will resolve to my signed response once it has gone through control group authorisation.

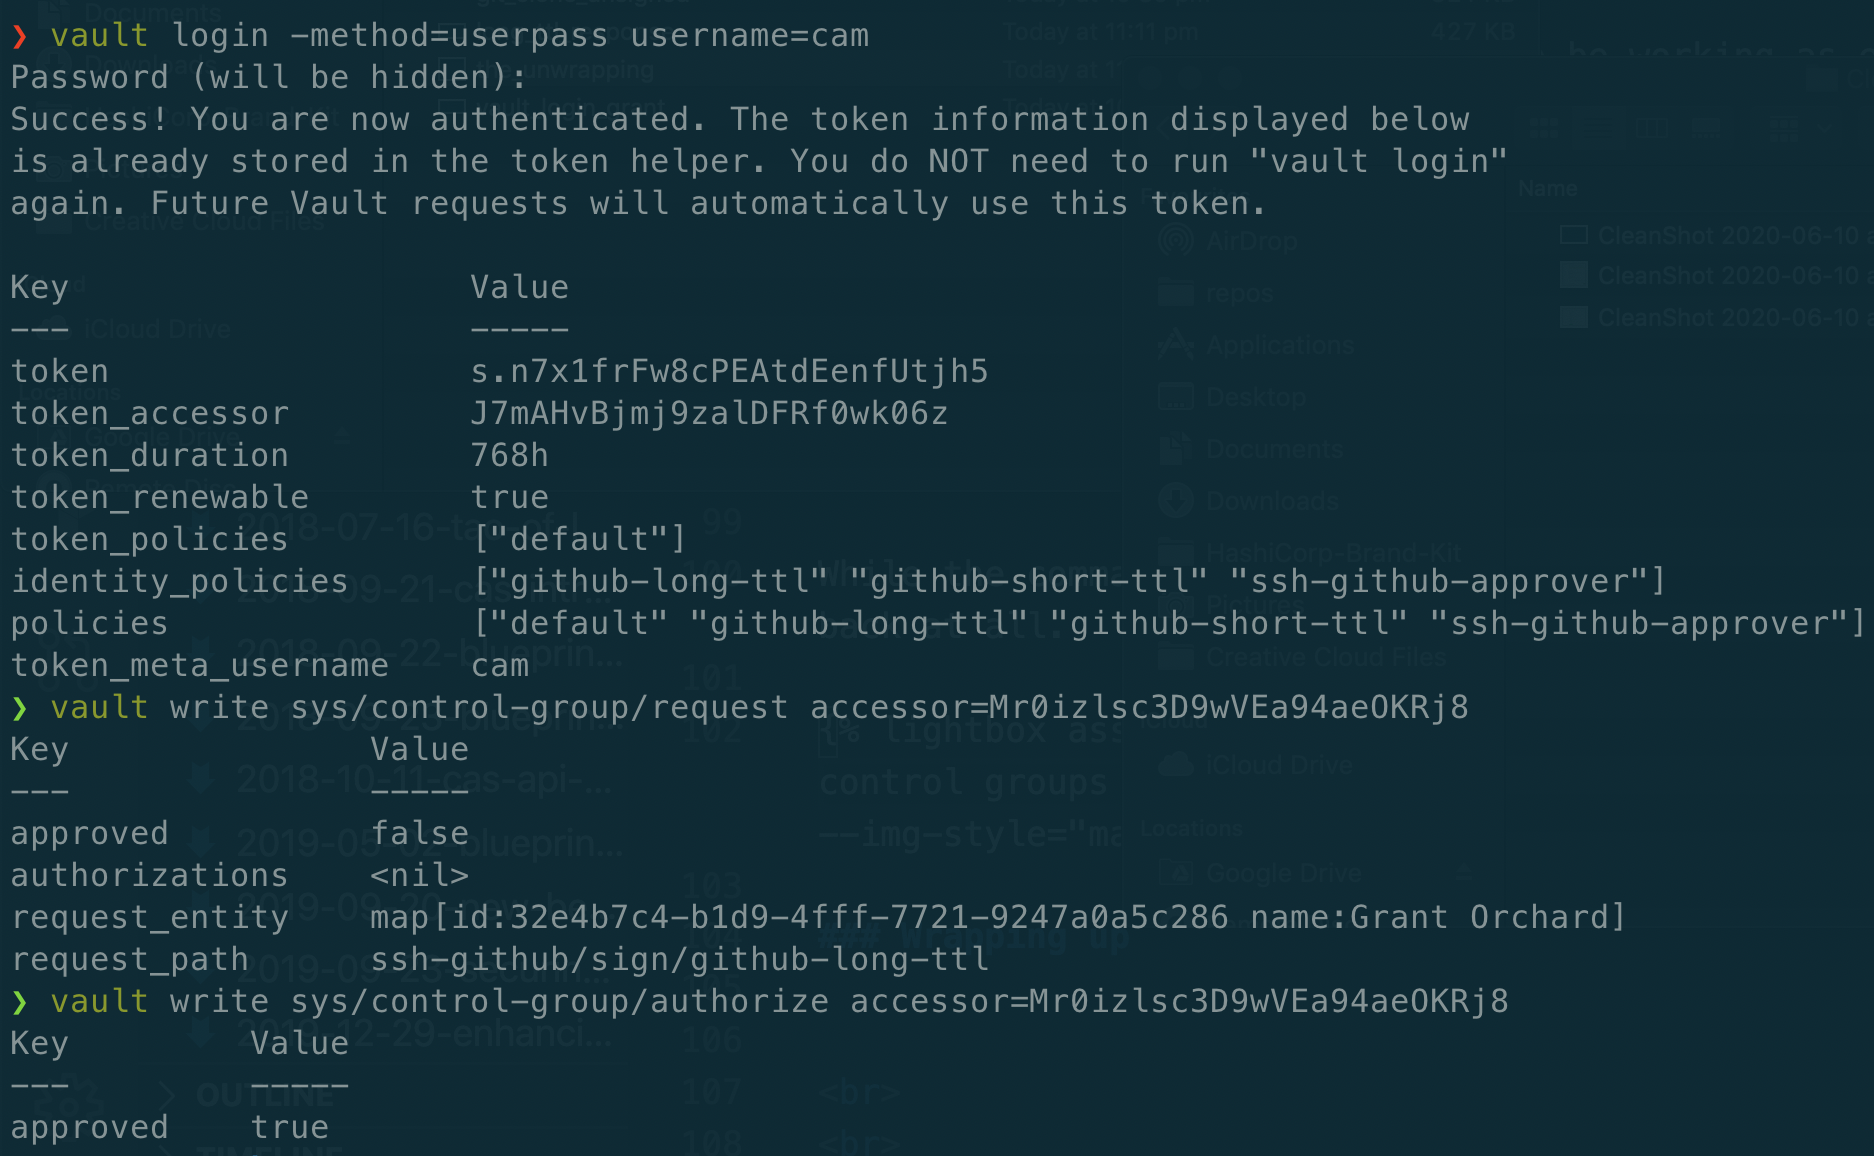
Here comes Cam, a member of the github_approvers group. First he’s going to check the status of the authorisation process by submitting the accessor id. Then he modifies the path slightly, and authorises the request.
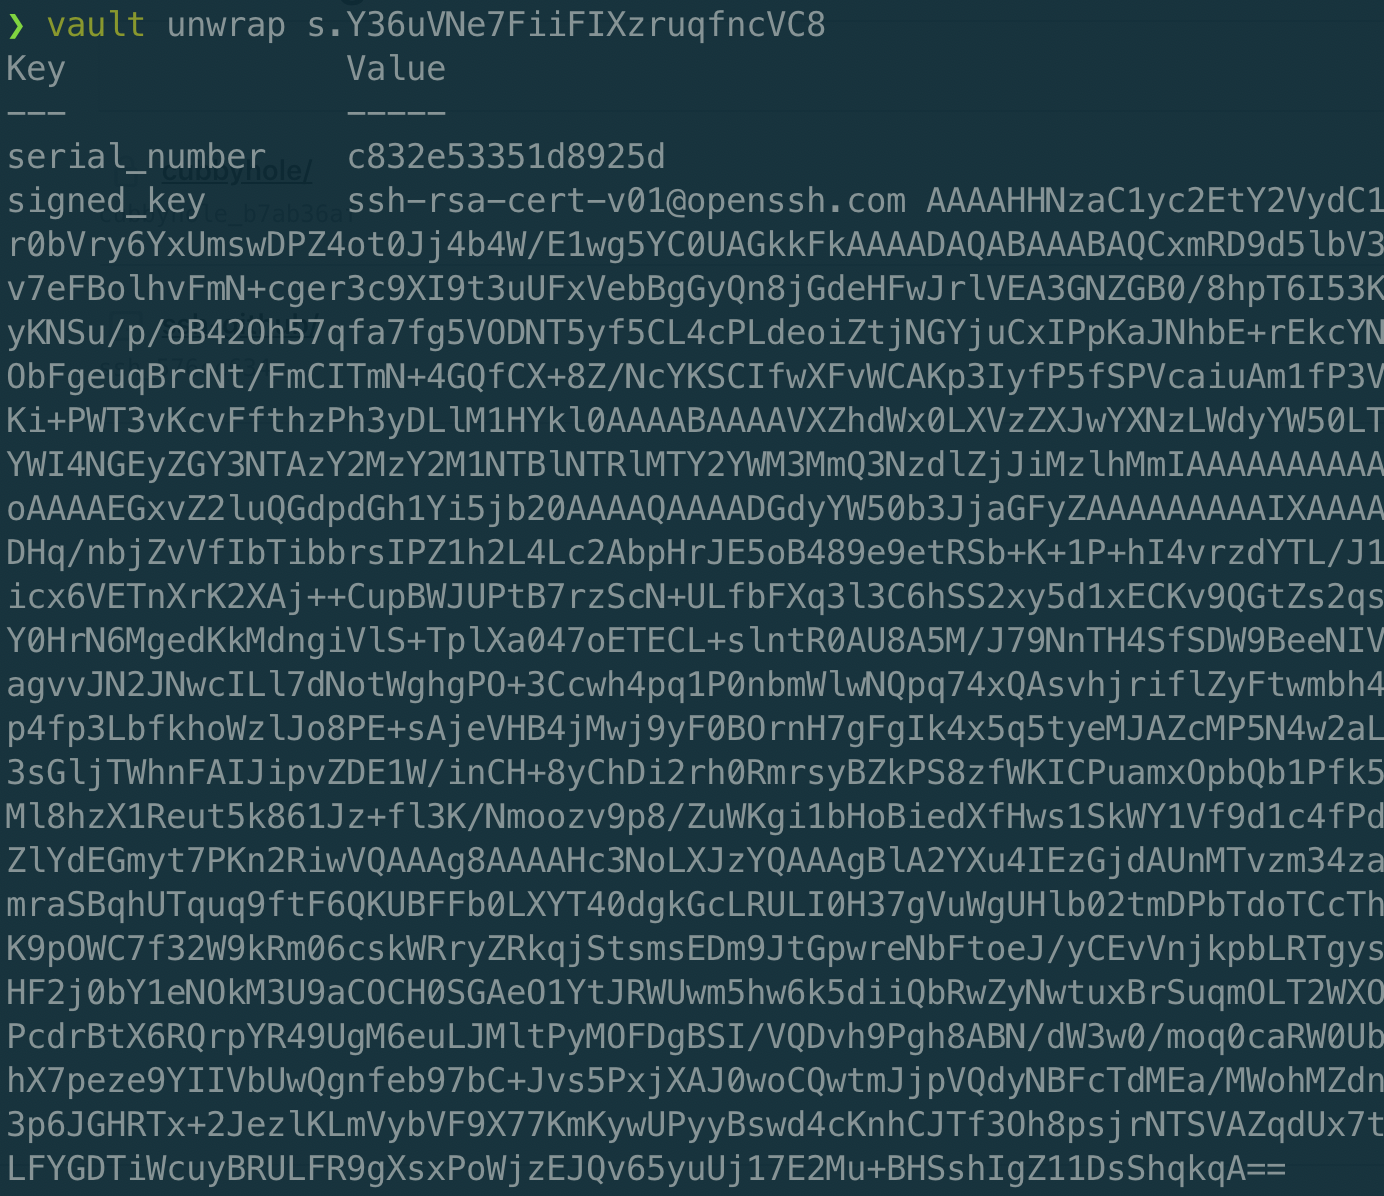
Once this is complete, I’m able ask Vault to unwrap my token, and voila! There is my signed key.
After I write that to ~/.ssh/github/id_rsa-cert.pub, I run one final command to ensure that my signed key is valid for five days…. check!
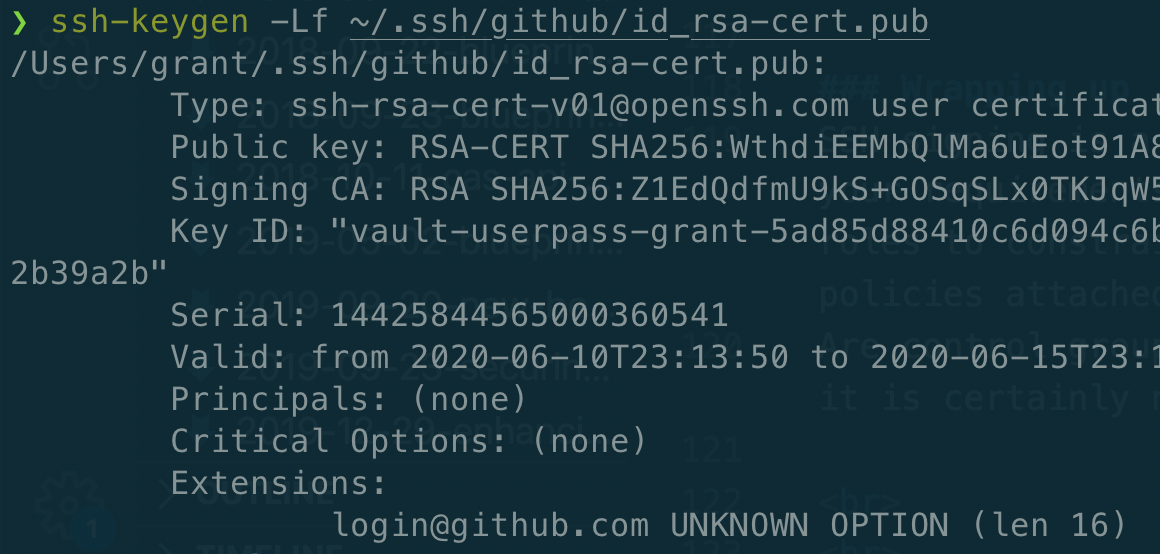
With that, I’m good to keep working on my code and interacting with GitHub without further interruption.
Wrapping up
SSH signing is a highly flexible capability with a number of different use cases. Depending on your requirements, you could choose to have multiple CAs to perform the signing, multiple Vault roles to constrain the signing options and TTL, and control access to the roles through Vault policies attached different teams or groups of users.
Are control groups overkill in this scenario? I guess it depends on your level of paranoia, but it is certainly nice to know that this kind of capability exists if you need it.