
One of the most tedious processes I had to navigate as both a user and an engineer was to get firewall rules defined and implemented when a new application was due to be provisioned.
I’m going to show you how we can remove that pain with vCAC and NSX. Specifically, I’m going to show you how to tap into Service Composer and use Security Groups and Security Policies to allow workloads to inherit a set of rules that your security team have defined and created for you.
1. Security Groups
Security Groups are a policy driven tagging mechanism. Yes, I know – these days everything is “policy driven”, so let’s take a look at exactly what I mean by that.
In this image, you can see some Security Groups that I’ve defined. These have been created with a typical three tier app in mind, however there is nothing stopping you from going through the same process for single VMs – for example, creating a “Secure Windows” Security Group (which would of course entail assigning a Security Policy that didn’t allow any traffic in or out of the VM…).

I’ve now opened up the Web Server Security Group, and as you can see we have some nice options around defining what objects should be included within this group. The condition can be set to require any or all criteria to be met. We also have the capability to explicitly define objects to include or exclude.

So, let’s define the rules for our Web Servers – a simple policy based on VM naming conventions.
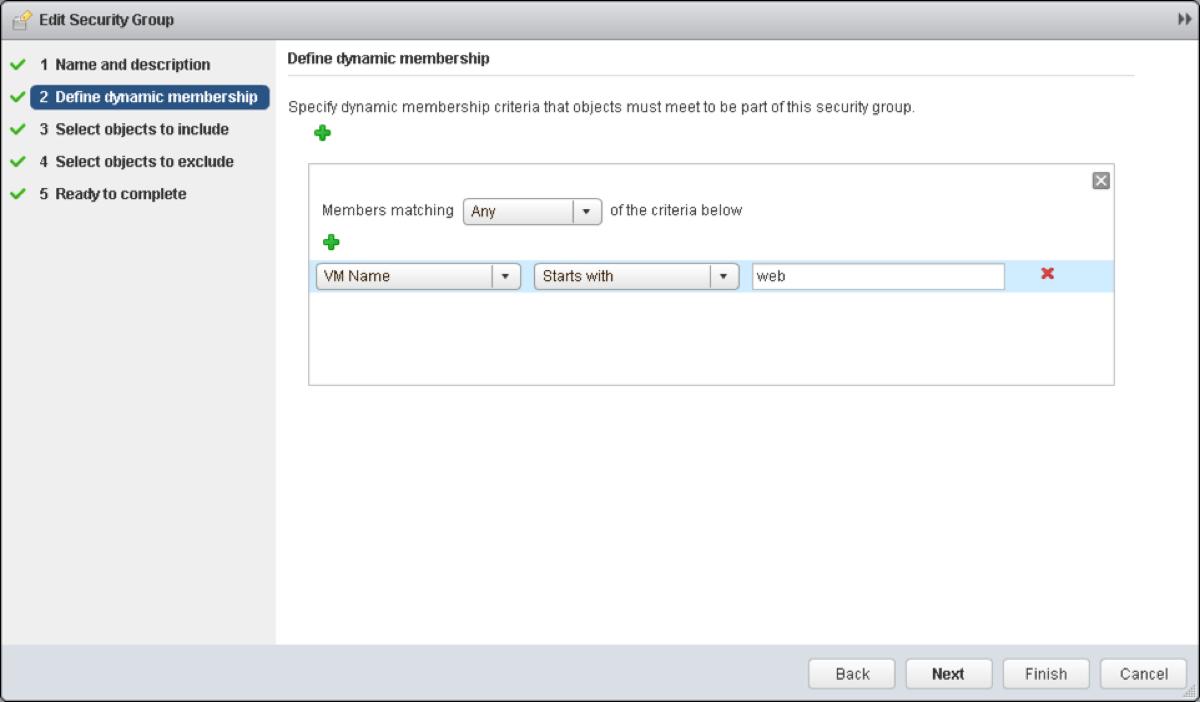
The good news is that we can define the naming convention with vCAC out of the box. As you can see I’ve created naming conventions for each of the three tiers – Web, App and Database. These prefixes are then attached to a Blueprint as a default naming convention, which means that as soon as they are deployed, the NSX policy engine will add them into the appropriate Security Group.

2. Security Policies
I could spend hours on this. Actually, that’s a lie – I’d claw my eyes out. A guy who will spend days on this is Anthony Burke – if information about this is not in his NSX Compendium by the time you click that link it won’t be long off </plug>.
Security Policies are what you may think of as traditional firewall rulesets. Plus. They can also contain information about Endpoint Service such as AntiVirus, Vulnerability Management and Data Security. In addition to this you can define Network Introspection Services that you want as part of the policy.
For this particular policy, I’m going to isolate any machines in the DB Security Group from those in the Web Security Group. Again, this is in the context of the three tier app. Something that you may not be aware of is that any VM that are provisioned as part of a Multi-Machine Blueprint – even on separate segments, and even if the Network Profile is Private – can communicate with any other VM provisioned as part of that instance by default. Any traffic initiated from outside the Edge Services Router (ESR) cannot enter Private Networks. A more detailed post on Network Profiles is in draft.[/one_third] [two_thirds_last]
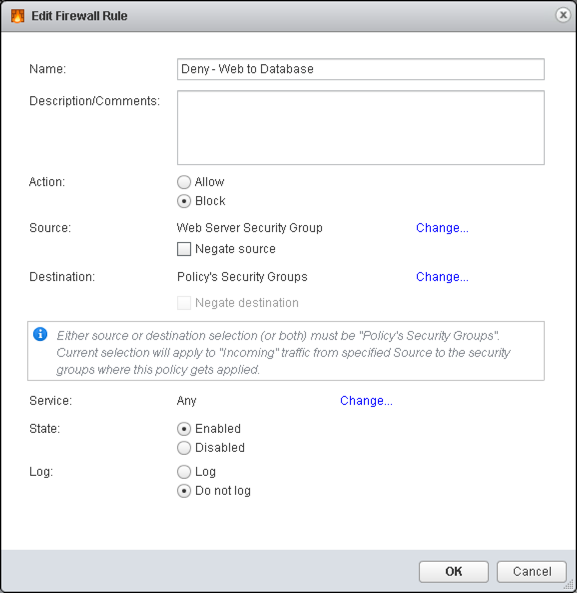
You’ll note a couple of familiar settings – Allow/Block, Enabled/Disabled, Log/Do not log. The differing settings are the Source and Destination, whereby you can define either Source or Destination as the Security Group(s) which you apply this policy to. You can then define the opposing Source/Destination to a specific Security Group. In this ruleset, I’ve defined the Source as the Web Server Security Group and I will attach the Security Policy to our Database Security Group.
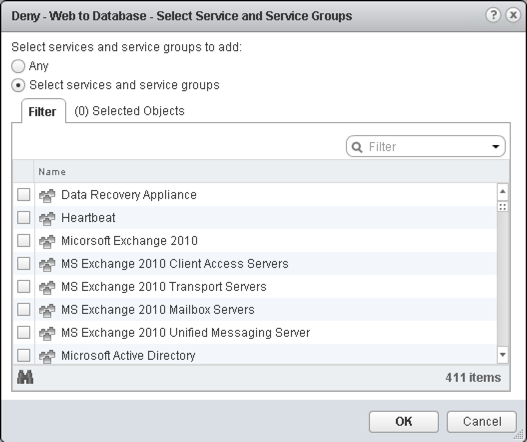
One thing that I haven’t defined in this ruleset are specific Services to block. If you were inclined to allow or deny specific services, you can scroll through the 411 options and select the specific service that you’re looking for. [/one_third][two_thirds_last]
The final step is to attach the Security Policy to a Security Group. My mouse didn’t quite make it into the screenshot, but imagine for a moment that I’m hovering it over the icon to the left of the Delete button (the big red cross). That is the “Apply Policy” button.[/one_third] [two_thirds_last]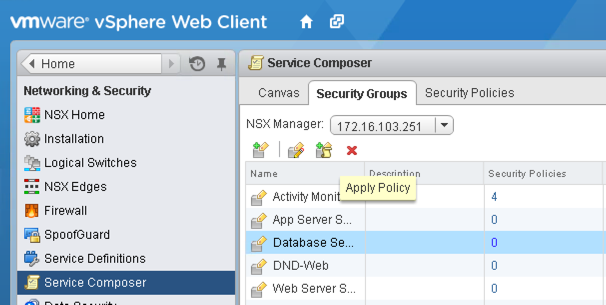 [/two_thirds_last]
Select one or more Security Policies to apply to the Security Group and click OK.With that, you’re done. Go provision some VMs with the appropriate machine prefix and watch the magic happen.[/one_third][two_thirds_last]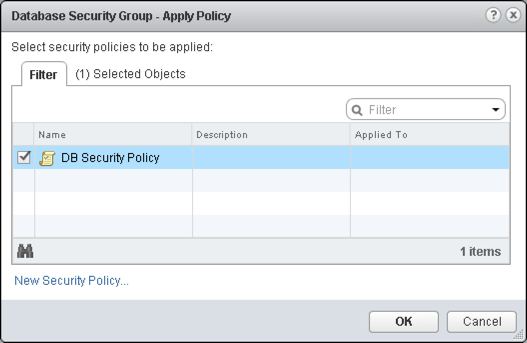
I can already hear you asking what happens when you don’t have a solid naming convention to bring VMs into a policy driven Security Group. We can still help you there!
This screenshot is from the Multi-Machine Blueprint configuration screen. I’ve clicked the “Edit” button under Network on the Web component Blueprint. As you can see, you can tick one or more checkboxes to have the machine(s) added explicitly to a Security Group.[/one_third][two_thirds_last]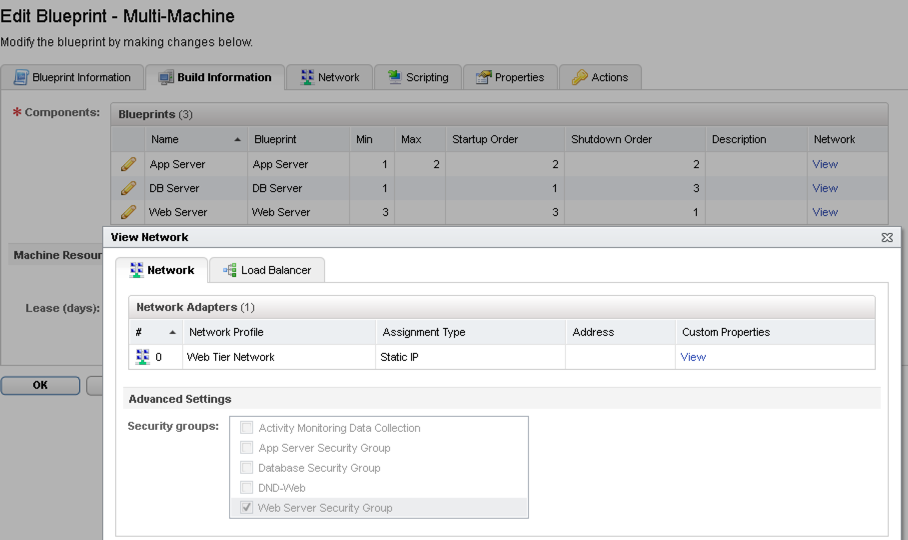
The final question to ask is how we achieve this with a normal Blueprint – those check boxes don’t exist right? You’re right, they don’t. What we need to do is define a Custom Property on each normal Blueprint you want to enable this on. The easiest way to achieve this is by using a Build Profile.
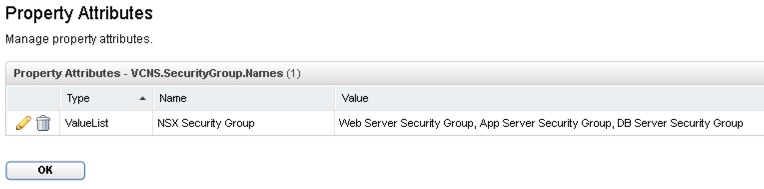
The first step is to define the Custom Property in the Property Dictionary (found in Infrastructure > Blueprint). Click on “New Property Definition” and then enter VCNS.SecurityGroup.Names as the Name, and a sensible Display Name and Description. Click the Edit button to modify the Property Attributes.[/one_third][two_thirds_last][
](https://grantorchard.com/assets/images/2014/04/Enable-Build-Profile.png) ![]()
Click on New Property Attribute, and choose the type ValueList. Give it a name and then enter the name of the NSX Security Groups (comma separated) that you want users to be able to select from during the request. Click OK.
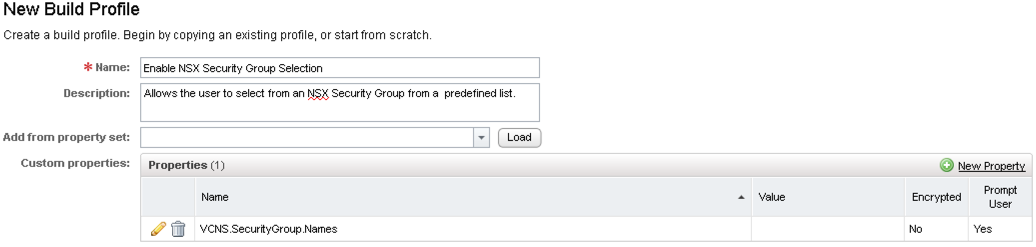
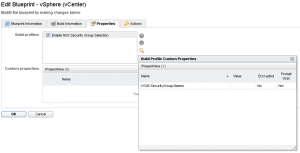
Create your Build Profile, add the Custom Property VCNS.SecurityGroup.Names and click in the check box to enable Prompt User.
The final step is to head over to the Blueprint that you want to enable this on and put a check box in the Custom Property.
 (https://grantorchard.com/assets/images/2014/04/Enable-Build-Profile.png)
Here is the final result in your Blueprint.
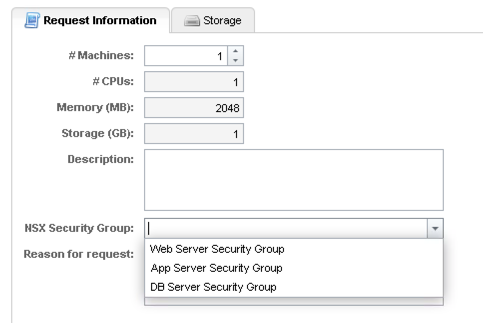
The bad news is that you’ll need to manually manage the values of the Custom Property to keep it in sync with the NSX Security Groups. Hopefully we will see similar functionality to the checkboxes from Multi-Machine Blueprints make their way into the single machine Blueprints in future.